
This is a practical guide to GitHub Actions. The goal is simple: learn how to create a workflow, run it, read the result, debug a failure, and understand what to improve next.
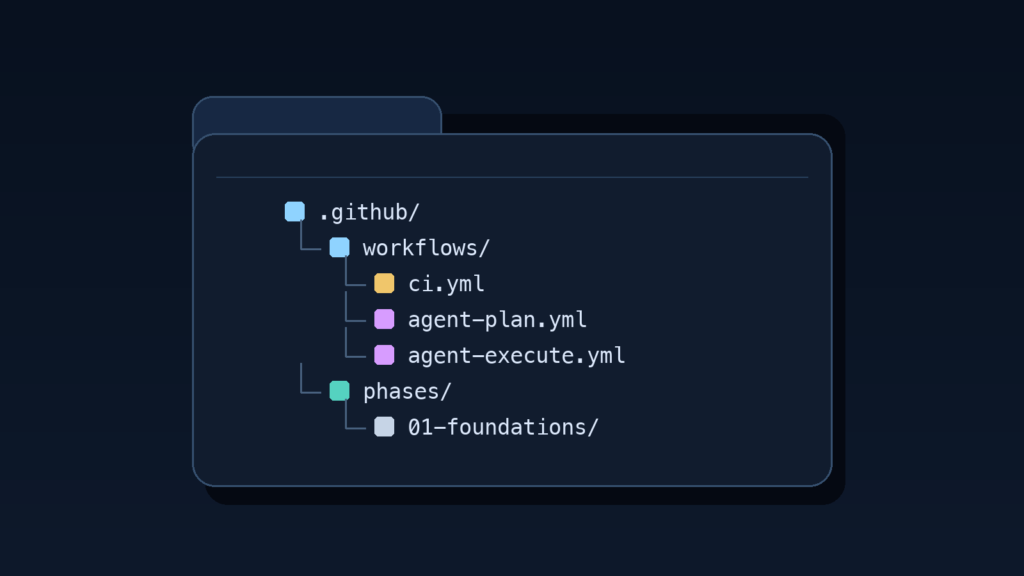
In simpler terms: GitHub Actions is the robot in your repository that runs the checks you do not want to forget.
The practice repository is here if you want files to follow along with: CarlasHub/gh-actions-agentic-crawler-tutorial. Use it as a pointer, not as the whole lesson.
What you will learn
- What a GitHub Actions workflow is.
- Where workflow files live.
- How to write a first workflow.
- How to run checks automatically on push and pull request.
- How to run a workflow manually.
- How to read the Actions screen when something fails.
- How permissions, secrets, jobs, steps, and runners fit together.
The mental model
A GitHub Actions workflow is a YAML file that tells GitHub what to do when something happens in your repository.
| Word | In simpler terms | Example |
|---|---|---|
| Workflow | The automation file. | .github/workflows/ci.yml |
| Event | The thing that starts the workflow. | push, pull_request, workflow_dispatch |
| Job | A named group of work. | test |
| Runner | The machine GitHub uses to run the job. | ubuntu-latest |
| Step | One command or one reusable action. | run: pytest |
Event starts workflow. Workflow runs jobs. Jobs run steps. Steps run commands or actions.
Where workflows live
GitHub only treats YAML files as active workflows when they are inside this folder:
.github/workflows/That folder name matters. A file called ci.yml in another folder is just a file. A file called .github/workflows/ci.yml is an active workflow.
Lesson 1: write your first workflow
Create this file in your repository:
.github/workflows/hello.ymlAdd this content:
name: Hello workflow

on:
  push:

jobs:
  hello:
    runs-on: ubuntu-latest
    steps:
      - name: Say hello
        run: echo "Hello from GitHub Actions"
Commit and push the file. Then open your repository on GitHub and go to the Actions tab.
You should see a workflow run called Hello workflow. Open it, then open the hello job, then expand the Say hello step.
What you just learned
nameis the workflow name shown in GitHub.on: pushmeans the workflow runs after a push.jobscontains the work GitHub will run.runs-on: ubuntu-latestasks GitHub for an Ubuntu machine.runruns a shell command.
Lesson 2: run real project checks
A hello workflow proves the pipe works. The next step is to run something useful.
For a Python project, a basic CI workflow usually checks out the code, installs Python, installs the project, and runs tests.
name: CI

on:
  push:
    branches:
      - main
  pull_request:

permissions:
  contents: read

jobs:
  test:
    name: Run Python tests
    runs-on: ubuntu-latest
    steps:
      - name: Checkout repository
        uses: actions/checkout@v4

      - name: Set up Python
        uses: actions/setup-python@v5
        with:
          python-version: "3.12"

      - name: Install project and test tools
        run: pip install -e .[dev]

      - name: Run tests
        run: pytest
What this workflow does
| Line | Meaning |
|---|---|
on: push | Run when code is pushed. |
on: pull_request | Run when a pull request is opened or updated. |
permissions: contents: read | Give the workflow read-only repository access. |
actions/checkout@v4 | Download the repository files into the runner. |
actions/setup-python@v5 | Install the Python version needed for the job. |
pip install -e .[dev] | Install the project and development dependencies. |
pytest | Run the test suite. |
This is the first useful GitHub Actions pattern: run the same checks every time code changes.
Lesson 3: read a workflow run
When a workflow runs, do not just look for green or red. Open the run and read it in this order:
- Open the Actions tab.
- Choose the workflow name.
- Open the latest run.
- Open the job, such as Run Python tests.
- Expand each step.
- Find the first failing step.
- Read the command that ran.
- Read the error below that command.
The useful question is not “why is GitHub broken?” The useful question is “which command failed, and what did that command say?”
Lesson 4: break it on purpose
The fastest way to learn CI is to break it safely.
- Change one test so it fails.
- Run the test locally.
- Commit the change on a branch.
- Push the branch.
- Open the Actions tab.
- Find the failed workflow run.
- Open the failed step.
- Read the error.
- Fix the test.
- Push again and watch the workflow turn green.
This teaches the real skill: using GitHub Actions as feedback, not decoration.
Lesson 5: use manual workflows
Not every workflow needs to run automatically. Some workflows should run only when a person starts them.
That is what workflow_dispatch is for.
name: Manual check

on:
  workflow_dispatch:
    inputs:
      message:
        description: "Message to print"
        required: true
        default: "Run a manual check"

jobs:
  print:
    runs-on: ubuntu-latest
    steps:
      - name: Print message
        run: echo "${{ inputs.message }}"
After this file is on the default branch, GitHub shows a Run workflow button on the Actions screen. GitHub’s docs note that manually running this kind of workflow requires the workflow to use workflow_dispatch and be available from the default branch.
Lesson 6: know when to use run and uses
Steps usually do one of two things:
| Step type | Use it when | Example |
|---|---|---|
run | You want to run a shell command. | run: pytest |
uses | You want to use a reusable action. | uses: actions/checkout@v4 |
Use run for commands you would type in a terminal. Use uses for packaged actions maintained by GitHub or other projects.
Lesson 7: add more jobs when work is separate
A job is a separate block of work. A project might have one job for tests and another job for linting.
jobs:
  lint:
    runs-on: ubuntu-latest
    steps:
      - uses: actions/checkout@v4
      - run: ruff check .

  test:
    runs-on: ubuntu-latest
    steps:
      - uses: actions/checkout@v4
      - uses: actions/setup-python@v5
        with:
          python-version: "3.12"
      - run: pip install -e .[dev]
      - run: pytest
By default, separate jobs can run independently. If one job must wait for another, use needs.
jobs:
  test:
    runs-on: ubuntu-latest
    steps:
      - run: echo "Run tests"

  deploy:
    needs: test
    runs-on: ubuntu-latest
    steps:
      - run: echo "Deploy only after tests pass"
Lesson 8: keep permissions small
Permissions decide what the workflow token can do. Start small.
permissions:
  contents: read
That is enough for a workflow that only reads the repository and runs tests. If a workflow needs to open a pull request, publish a package, or write to GitHub, it needs more permissions. Add those only when the workflow actually needs them.
Lesson 9: use secrets carefully
Secrets are values such as tokens, API keys, and deployment credentials. Do not hard-code them in YAML.
Store them in GitHub repository, environment, or organization secrets, then reference them in the workflow.
env:
  API_TOKEN: ${{ secrets.API_TOKEN }}
If a workflow can deploy, publish, delete, or write to another system, treat it as production code.
Debugging checklist
When a workflow fails, check these things in order:
- Did the workflow file live inside
.github/workflows/? - Did the event actually happen?
- Is the YAML indentation valid?
- Did the job start?
- Which step failed first?
- Can you run the failing command locally?
- Is a dependency missing?
- Does the workflow need a permission it does not have?
- Does the workflow need a secret that has not been configured?
- Is the failure caused by the code, not by GitHub Actions?
Common mistakes, debunked
| Mistake | What is actually true |
|---|---|
| Every YAML file is a workflow. | Only YAML files inside .github/workflows/ are active workflows. |
| Green means the app is perfect. | Green only means the checks you wrote passed. |
| Red means GitHub Actions is broken. | Red usually means one command failed. Read the failed step. |
| Secrets go directly in the YAML file. | Secrets belong in GitHub Secrets, then the workflow references them. |
| More automation is always better. | Useful automation is better. Start with one reliable workflow. |
A realistic order to learn GitHub Actions
- Create a hello workflow.
- Run it on push.
- Open the Actions tab and read the run.
- Create a CI workflow that runs tests.
- Break a test and read the failure.
- Fix the test and watch the workflow pass.
- Add pull request checks.
- Add a manual workflow with
workflow_dispatch. - Learn permissions and secrets.
- Only then move to deployments, artifacts, matrices, and reusable workflows.
Part 2: use the practice repo as a lab
The practice repository is useful because it gives GitHub Actions something real to check. It is small enough to understand, but it still has the same moving parts you see in larger projects: code, tests, workflow files, manual runs, permissions, pull requests, and reports.
Repository: CarlasHub/gh-actions-agentic-crawler-tutorial.
What the repo contains
| File or folder | What it teaches | Why it matters |
|---|---|---|
crawler_tool/ | The small Python app. | CI needs real code to test. |
tests/test_crawler.py | The test suite. | GitHub Actions is only useful when it runs meaningful checks. |
.github/workflows/ci.yml | Automatic CI. | This is the first workflow to understand. |
.github/workflows/agent-plan.yml | A manual planning workflow. | Shows how a workflow can create a pull request instead of only running tests. |
.github/workflows/agent-execute.yml | A manual execution workflow. | Shows plan validation, controlled execution, tests, and a report PR. |
scripts/ | Helper scripts used by workflows. | Keeps workflow YAML readable by moving logic into code. |
phases/ | Progressive learning examples. | Shows how the same GitHub Actions ideas scale toward web teams. |
Step 1: understand the tiny app first
The repo uses a fake crawler. It does not crawl the live internet. It reads a JSON map that pretends to be a website.
That design choice is important. A tutorial project should be predictable. If the crawler depended on real websites, network errors and external changes would distract from the GitHub Actions lesson.
The core idea is:
result = crawl_site(
    start_url="https://example.com/",
    site_map=SITE_MAP,
    exclude_paths=["/admin", "/private"],
    max_pages=20,
)
The crawler should visit normal pages, skip excluded paths, skip other domains, and stop at the configured page limit.
Why this is a good CI exercise
Good CI starts with a question: what should the machine prove every time the code changes?
In this repo, the machine should prove that the crawler still behaves correctly.
| Behavior | Test proves | Why CI should check it |
|---|---|---|
| Normalize exclude paths. | admin becomes /admin. | Users may type paths in different formats. |
| Skip exact excluded path. | /admin is skipped. | The crawler must respect blocked areas. |
| Skip nested excluded path. | /admin/settings is skipped. | Protected sections often have child pages. |
| Do not over-match similar words. | /administrator-notes is not skipped by /admin. | Over-broad matching creates false positives. |
| Skip other domains. | External URLs are not visited. | A crawler needs scope control. |
| Respect max pages. | The crawler stops at the limit. | Safety limits prevent runaway automation. |
This is the part many tutorials skip. The workflow is not the real point. The real point is the agreement between code, tests, and automation.
GitHub Actions does not magically know what quality means. You define quality through the commands you ask it to run.
Step 2: run the project locally
Before relying on GitHub Actions, run the same checks locally. This removes mystery. CI should repeat known commands, not hide unknown ones.
git clone https://github.com/CarlasHub/gh-actions-agentic-crawler-tutorial.git
cd gh-actions-agentic-crawler-tutorial
python -m venv .venv
source .venv/bin/activate
pip install -e '.[dev]'
pytest
On Windows PowerShell, activation uses a different command:
.venvScriptsActivate.ps1If the tests pass locally, the project is healthy before CI runs. If they fail locally, fix that first. Do not push broken commands to GitHub and hope the platform understands your intentions.
Step 3: run the crawler manually
The CLI command is useful because it shows the code behavior without needing to read every line of Python first.
python -m crawler_tool.cli
  --start https://example.com/
  --site-map examples/site_map.json
  --exclude /admin
  --exclude /private
This command says:
- Start at
https://example.com/. - Use
examples/site_map.jsonas the fake website. - Skip paths under
/admin. - Skip paths under
/private.
The output is JSON. Look for two lists: visited and skipped. That output gives you a concrete thing to compare against the tests.
Step 4: map the local command to CI
Now open .github/workflows/ci.yml. The workflow runs the same kind of checks you ran locally.
name: CI

on:
  push:
    branches:
      - main
  pull_request:

permissions:
  contents: read

jobs:
  test:
    name: Run Python tests
    runs-on: ubuntu-latest

    steps:
      - name: Checkout repository
        uses: actions/checkout@v4

      - name: Set up Python
        uses: actions/setup-python@v5
        with:
          python-version: "3.12"

      - name: Install project and test tools
        run: pip install -e .[dev]

      - name: Run tests
        run: pytest
Read this workflow as a story:
- When code is pushed to
main, or when a pull request changes, start CI. - Give the workflow read-only access to repository contents.
- Create one job called
test. - Run that job on a temporary Ubuntu machine.
- Download the repo onto the machine.
- Install Python 3.12.
- Install the project and test tools.
- Run
pytest.
Why each CI step exists
| Step | Why it exists | What breaks without it |
|---|---|---|
actions/checkout@v4 | The runner starts empty, so it needs the repo files. | Commands cannot find your project. |
actions/setup-python@v5 | The project needs a known Python version. | The job may use the wrong runtime. |
pip install -e .[dev] | Installs the package and test dependencies. | pytest or imports may fail. |
pytest | Runs the evidence that behavior still works. | The workflow has no quality signal. |
Step 5: use failure as the lesson
Open tests/test_crawler.py. Change one expected value so a test fails. For example, change an assertion that expects https://example.com/contact to be visited.
Then run:
pytestRead the failure before fixing it. The point is to learn the path from failed behavior to failed test to failed workflow.
- Run the test locally and see the failure.
- Push the branch and let CI fail too.
- Open the failed workflow run.
- Open the failed job.
- Expand
Run tests. - Find the pytest error.
- Fix the test or the code.
- Push again.
A red workflow is not the end of the story. It is the pointer to the exact command that needs attention.
Step 6: understand the manual planning workflow
The repo also has agent-plan.yml. This workflow is different from CI because it does not run automatically. It uses workflow_dispatch, so a person starts it from the Actions tab.
Its purpose is to turn a task description into an agent-plan.md pull request.
on:
  workflow_dispatch:
    inputs:
      task:
        description: "Describe the agent task"
        required: true
        default: "Improve the crawler exclude path behaviour and update tests."
This teaches a different GitHub Actions pattern: workflows can ask for input, run a script, create a branch, commit a file, and open a pull request.
The important steps are:
- Checkout the repository.
- Set up Python.
- Run
scripts/create_agent_plan.py. - Run
scripts/validate_agent_plan.py. - Create a branch.
- Commit
agent-plan.md. - Use the GitHub CLI to open a pull request.
This is not just “AI content.” It is process automation. The workflow creates a reviewable artifact before execution happens.
Why the planning workflow needs write permissions
The CI workflow only needs read access because it reads code and runs tests. The planning workflow needs more because it writes a branch and opens a pull request.
permissions:
  contents: write
  pull-requests: write
This is the permission rule in practice: give the workflow the smallest permissions that let it do its job.
Step 7: understand the execution workflow
The next workflow is agent-execute.yml. It is also manual. It takes a path to an approved plan, validates it, simulates execution, runs tests, and opens a pull request with an execution report.
The flow is:
approved plan
  -> validate the plan
  -> run controlled execution
  -> run tests
  -> create execution report
  -> open pull request
This is the agentic development idea in the repository: planning and execution are separated.
Why? Because an automated system should not jump straight from “task idea” to “changed code” without a reviewable plan. Even in this teaching repo, the execution is simulated. That is a good constraint. It teaches the workflow shape without requiring API keys or a real coding agent.
What the simulator teaches
The simulator reads AGENTS.md, reads the plan, checks that required plan sections exist, and writes AGENT_EXECUTION_REPORT.md.
| Script | What it does | Lesson |
|---|---|---|
create_agent_plan.py | Creates a structured plan from a task input. | Automation can create a reviewable artifact. |
validate_agent_plan.py | Checks the plan has required sections. | Do not execute vague plans. |
agent_execute_simulator.py | Reads instructions and plan, then writes a report. | Execution should produce evidence. |
The important idea is not the simulator itself. The important idea is the controlled shape:
Task input becomes a plan. The plan is validated. Execution produces evidence. Tests run before review.
Step 8: connect this to real teams
The phases/ folder shows how the same ideas grow in professional work.
| Phase | What it adds | Why it matters |
|---|---|---|
| Phase 1: Foundations | Workflow, event, job, step, runner, logs. | This is the minimum vocabulary needed to read Actions. |
| Phase 2: Web CI | Install, lint, typecheck, test, build. | Web apps need more than unit tests. |
| Phase 3: Team Workflow | Pull request checks, branch protection, path filters, concurrency, needs. | Teams need automation that runs at the right time and blocks the right things. |
| Phase 4: Deployments | Preview, staging, production, environments, approvals, artifacts. | Deployment is a controlled release process, not just another test step. |
| Phase 5: Professional Patterns | Reusable workflows, artifacts, security basics. | Larger teams need consistency, reuse, and tighter permissions. |
How to study the repo without getting lost
Use this order:
- Run
pytestlocally. - Open
tests/test_crawler.pyand understand what behavior is protected. - Open
.github/workflows/ci.ymland map each step to a local command or setup action. - Push the repo and inspect the CI run in GitHub.
- Break one test and read the failure.
- Run
agent-plan.ymlmanually and inspect the plan PR. - Run
agent-execute.ymlmanually and inspect the report PR. - Then read the phase folders to see how the patterns grow.
The real lesson from this repository
The repository is not trying to teach every GitHub Actions feature at once. It teaches a more useful sequence:
- First, make checks repeatable.
- Then, make failures readable.
- Then, add manual workflows for controlled actions.
- Then, use pull requests as review gates.
- Then, scale toward team workflows, deployments, reusable workflows, and security.
That is the practical GitHub Actions path. Not YAML for YAML’s sake. Automation that makes project work safer, easier to review, and harder to forget.
Sources
- GitHub Docs: Workflow syntax for GitHub Actions
- GitHub Docs: Events that trigger workflows
- GitHub Docs: Manually running a workflow
- GitHub Docs: Building and testing Python
- GitHub Docs: GITHUB_TOKEN and workflow permissions
- GitHub Docs: Using secrets in GitHub Actions
Final takeaway
Do not start by memorizing every GitHub Actions feature. Start by making one workflow run. Then make it run a real check. Then learn how to read the result.
The real skill is not writing YAML. The real skill is turning repeatable project checks into reliable feedback.